When my uncle first stepped into my bathroom and saw my smart mirror border lights and screen come to life, he ran out and asked me “how do I make one!?”
A smart mirror is a simple device, yet when built properly it can seem incredibly futuristic.
To build a smart mirror, you need three main components: a two-way glass/acrylic surface to act as a mirror, a display such as a PC monitor or smartphone/tablet, and a device to run the mirror’s software such as a Raspberry Pi.
The right hardware for your smart mirror depends on how large you want it to be, the features you want it to have, and the overall quality of the mirror.
Let’s look at these main components and how to pick the right options for your smart mirror. Once you have an idea of the basic components of a smart mirror, check out my recommended parts list to get started building your smart mirror.
Different Surface Options For Your Smart Mirror
The whole idea behind a smart mirror is it has two functions. First, it acts like a regular mirror. You look at the mirror and see your regular reflection. Second, it also displays content from behind the mirror. Both of these functions is achieved with a two-way mirror.
We’ve all seen two-way mirrors in movies and TV during interrogation scenes:

From inside the interrogation room, it looks like a regular mirror. From the other side, the mirror is transparent. To stop the people in the interrogation room seeing through the mirror, the other room needs to be completely dark.
If lights were turned on in the other room, you would see those lights through the mirror.
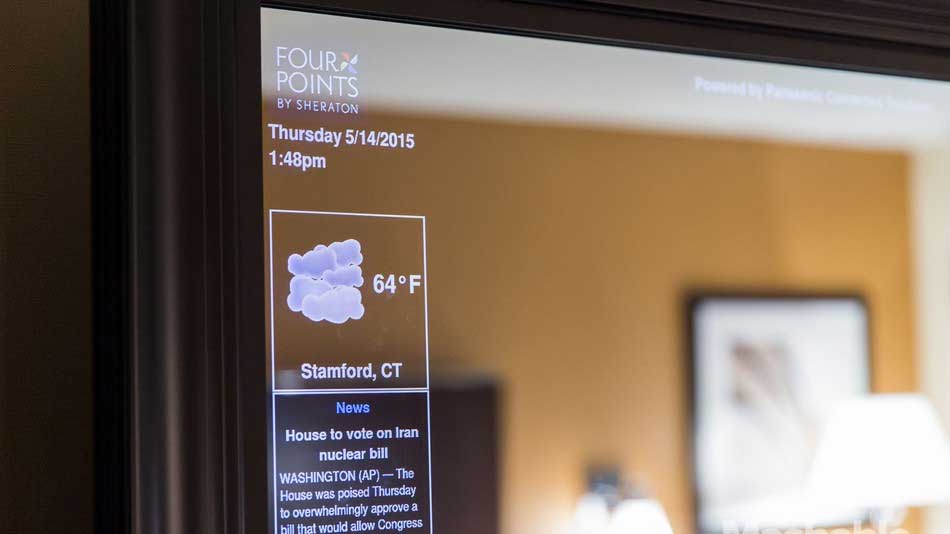
A smart mirror works in the same way. When a display is held behind a two-way mirror, the light from the display shines through. There are a few different ways this can be done using either glass or acrylic sheets.
On one side of these sheets, a reflective film reflects most (usually around 70%) of the light.
To find out the differences between glass and acrylic for your smart mirror, read through this article.
Displays For Your Smart Mirror
The type of display suitable for your smart mirror depends on the overall size. If you want a small smart mirror you can place on a stand on a table, a small display such as a tablet or smartphone would be ideal.
The benefit to using a tablet or smartphone is it removes the need to buy a separate device to run the software.
Simply attach the smartphone or tablet behind the mirror, plug it in to power, load up the app and you’re good to go.
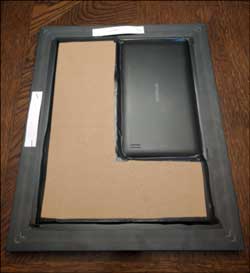
As you can see in this photo, it’s pretty quick and easy to mount a smartphone to the back of a standard photo frame.

If you want to build a larger smart mirror, the best choice is to use a PC monitor or TV. The large smart mirror I built for my bathroom uses a 21″ monitor. While the monitor doesn’t fill up the entire surface of the mirror (it’s a large mirror!), it provides plenty of screen space to display anything I want.
The other thing to consider is whether you want your display to cover the entire mirror surface or not. For example, if you have a 21″ mirror and a 21″ monitor, you can display information anywhere across the entire surface of the mirror. For smaller mirrors this is easy to do and they can look really effective.
For larger mirrors, trying to cover the entire surface of the mirror becomes expensive. You probably don’t want to buy a 27″ TV just so you can display content across the entire mirror’s surface.
When you think about it, you probably don’t want content in the middle of the mirror, getting in the way of your own reflection. When you look at photos of large smart mirrors across this site, you’ll notice that the content is displayed on the side or corners of the mirror.
Displaying the smart content on one side or corner of a large mirror means you can get away with using a smaller display on a large mirror. This keeps the cost down while still looking amazing.

Once you decide how big you want your smart mirror to be, it’s easy to figure out what size display to use. Or if you already have a display you can use (eg: an old tablet or monitor), you can plan out the size of your smart mirror.
For more details on choosing a monitor for your smart mirror, read through this guide.
Running the Smart Mirror Software
Once you have a mirror and a display, you need something to run the smart mirror software. If you’re using a smartphone or tablet, this is easy as you will already have everything you need.
Simply download one of the many smart mirror apps and you’re done. The downside of using an app is it limits the features you can add to your smart mirror.
If you want full control over the features of your smart mirror (eg: voice control, Alexa/Google integration, calendar, facial recognition), the most popular option is to use a Raspberry Pi.

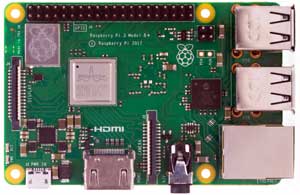
If you’ve never used a Raspberry Pi before, think of it as a computer the size of a credit card. They’re cheap computers that are extremely popular for electronics projects like this.
While they’re not as powerful as a typical desktop PC, they’re more than powerful enough to run a smart mirror.
The Raspberry Pi has an HDMI output, which will drive the monitor you use. The advantage of using a Raspberry Pi is that it’s easy to add extra features to your smart mirror now or in the future.
For example, you might want to connect speakers so you can use your mirror to speak to you or play music. You might want to add a motion sensor so your mirror turns on/off when it detects people in the area.
Or you might want to connect a microphone so you can give it voice commands.
A Raspberry Pi kit (see recommended parts here for details) is cheap to buy and comes with everything you need to run your smart mirror. Even if you don’t know anything about coding, you might be surprised with how easy it can be to use a Raspberry Pi for your projects.
Is It Hard to Build a Smart Mirror?
Building a smart mirror could take you less than an afternoon, or it could take a couple of weeks. It depends on the features you want your smart mirror to have, what hardware you’re going to use, and how big a mirror you want.
For example, if you have an old smartphone handy, you simply need to mount it behind a two-way mirror and download a smart mirror app. That’s an easy project that doesn’t require any time spent with software.
If you’re wanting to build a small to medium sized smart mirror, it will take a bit more effort. You will probably want to use a monitor as your display, so that requires a device such as the Raspberry Pi to run it.
While it’s not hard, if you haven’t used a Raspberry Pi for a project like this before, there’s a bit of a learning curve. The step-by-step tutorials and articles on this website make it easier, but there will be a few steps involved.
When building a smart mirror using a monitor as the display, you will also need to spend some time mounting the monitor to a frame. It’s a pretty simple job even if you haven’t done something like this before.
Building a large smart mirror isn’t really harder, but you need to be more careful with your build. Large mirrors have a lot of weight behind them, so you want to make sure you build a solid frame and correctly mount it to the wall. Taking your time with a large smart mirror build is important.
Overall, building a smart mirror is quite a simple project. If you follow the advice on this site, you’ll understand every step along the way. It’s a great way to get into Raspberry Pi projects and you can end up with a nice feature for your home.
Check out my recommended parts list here to see different hardware options for your smart mirror as well as other parts needed to put everything together.
